Admission season is around the corner. Your posters are up, your demo classes are planned, and the institute down the road has just announced a “Scholarship Test – up to 100% fee waiver”. Parents are already asking whether you have one too.
A scholarship test for your coaching institute can be one of the most effective admission tools you have, if you run it properly. Run it badly and it becomes an expensive discount scheme that fills seats with students who were never going to stay.
This guide walks you through planning, promoting and conducting a scholarship test, and turning test-takers into admissions.
What Is a Scholarship Test for a Coaching Institute?
A scholarship test is an entrance-style exam a coaching institute conducts before a new batch. Students who score well get a fee concession, usually in slabs based on their score or rank.
For the student, it is a chance to save money and check their level. For the institute, it does four useful jobs at once:
- Generates leads. Every registration is a student and parent interested in your courses.
- Shows you each student’s level before they join, so you can place them in the right batch.
- Rewards merit, which attracts serious students who lift the whole batch.
- Creates a deadline. Scholarships valid for a limited time give parents a reason to decide.
Why It Matters for Your Admissions
Most parents compare several institutes before choosing one. A scholarship test turns a passive enquiry (“What are your fees?”) into an action (“My child is taking your test on Sunday”). Once a student has spent two hours on your paper and received a personal result, you are no longer just one name on a list.
It works best as part of a wider plan to increase admissions, not as a standalone offer.
Step-by-Step: How to Conduct a Scholarship Test
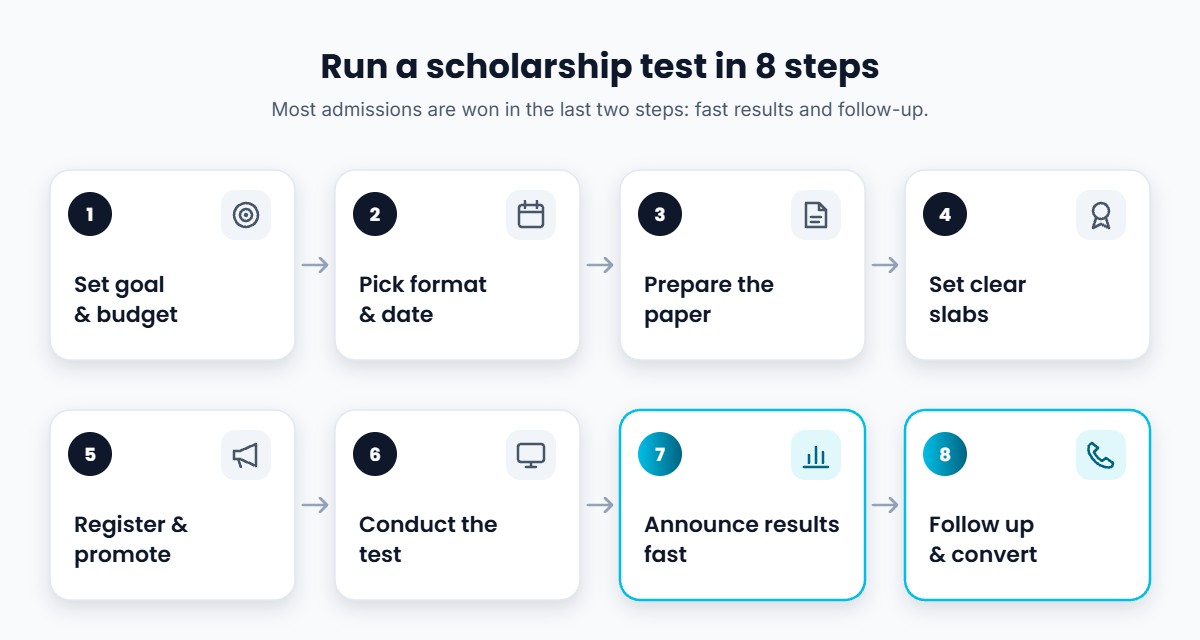
Step 1: Set Your Goal and Your Budget
Before designing anything, write down:
- Which batch the test is for (for example, Class 11 JEE, Class 9 Foundation, NEET repeaters).
- How many seats you want to fill.
- How much concession you can afford in total without hurting your margins.
That last number decides your scholarship slabs. Many institutes skip it and end up giving large discounts to students who would have joined anyway.
Step 2: Choose the Format and Date
| Format | Works well when | Watch out for |
|---|---|---|
| Online | Students are spread across a city or several towns; you want low logistics cost | Fair conduct: use timers, shuffled questions and question banks |
| Offline (at your centre) | You want parents to visit your campus | Hall capacity, invigilators, printing, travel for students |
| Hybrid (both) | You want reach and campus visits | Keep the papers equivalent in difficulty |
Pick a date that avoids school exams and major competitive exam dates. Weekends usually get better turnout. Offering two or three slots also helps.
Step 3: Prepare the Question Paper
- Syllabus: base it on what the student has already studied (usually the previous class), not on what you will teach.
- Pattern: mirror the exam they are preparing for (MCQs for JEE/NEET aspirants, a mix for foundation students).
- Length: 60–90 minutes is enough to rank students without exhausting them.
- Difficulty: include easy questions so every student finishes with some confidence, and enough hard ones to separate the top scorers.
You can speed up drafting with an AI question paper generator, but have a subject teacher check every question and answer key before the test.
Step 4: Set Clear Scholarship Slabs
Keep slabs simple and publish them in advance. Here is an illustrative structure. Adjust the percentages to your own budget from Step 1:
| Score / rank band | Example concession |
|---|---|
| Top 1% or rank 1–10 | Highest slab (e.g. 75–100% of tuition fee) |
| Top 10% | Mid slab (e.g. 40–50%) |
| Top 25% | Entry slab (e.g. 15–25%) |
| All participants | A small fixed concession or free study material, valid for a limited period |
Also publish the terms: which fee components the scholarship covers, how long the offer is valid, and whether it continues in the next year based on performance.
Step 5: Open Registrations and Promote the Test
Decide whether registration is free or carries a small fee. Free tests get more registrations. A nominal fee tends to bring more committed students. Either way, collect the student’s name, class, school, target exam and a parent’s phone number.
Give yourself three to four weeks of promotion:
- WhatsApp to past enquiries, current students’ parents and local groups. Our guide to WhatsApp marketing for coaching institutes covers how to do this without spamming.
- Schools and seminars, with permission: a short career talk followed by the test announcement.
- Posters, newspaper inserts and local banners. See these offline marketing ideas for coaching institutes.
- Instagram and YouTube, using short videos explaining the test pattern and how to prepare.
- Referrals, by asking current students to share the test with friends.
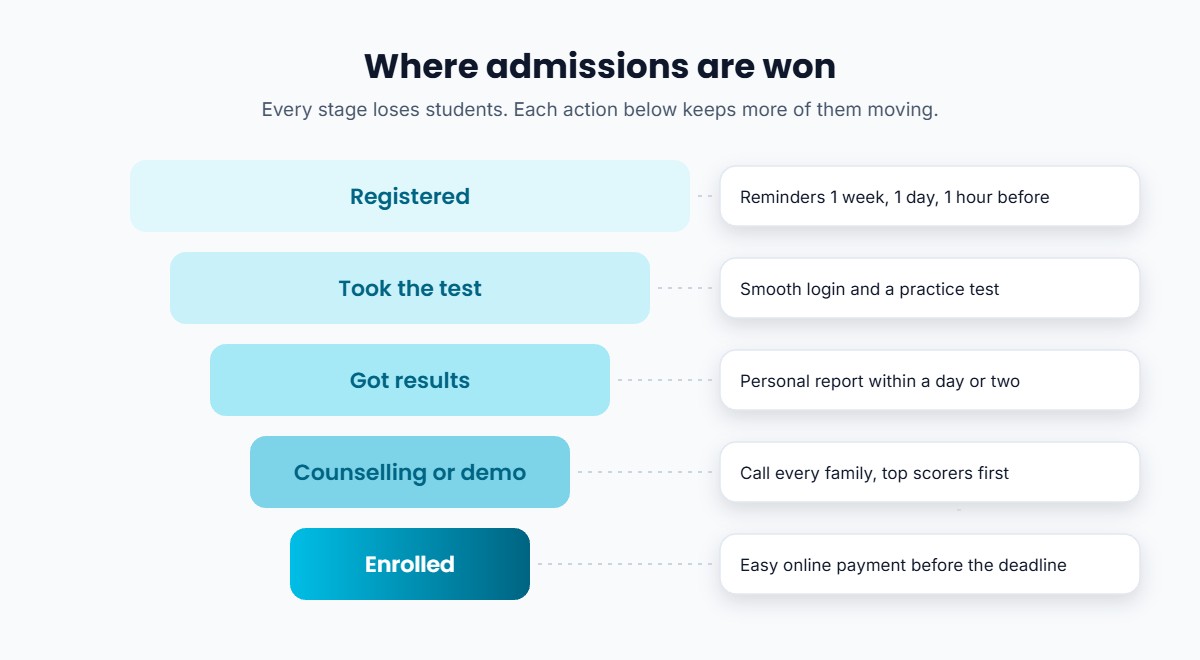
Send reminders one week, one day and one hour before the test.
Step 6: Conduct the Test Smoothly
For an online test, use a platform that supports timed tests, randomised question order and auto-grading. Share login steps two days early and run a short practice test so students aren’t stuck on the day.
For an offline test, prepare seating plans, extra question papers, OMR sheets if needed, and a help desk for parents. Treat the parents waiting outside as guests: it is often their first visit to your centre, so show them your classrooms and faculty.
Step 7: Announce Results Quickly
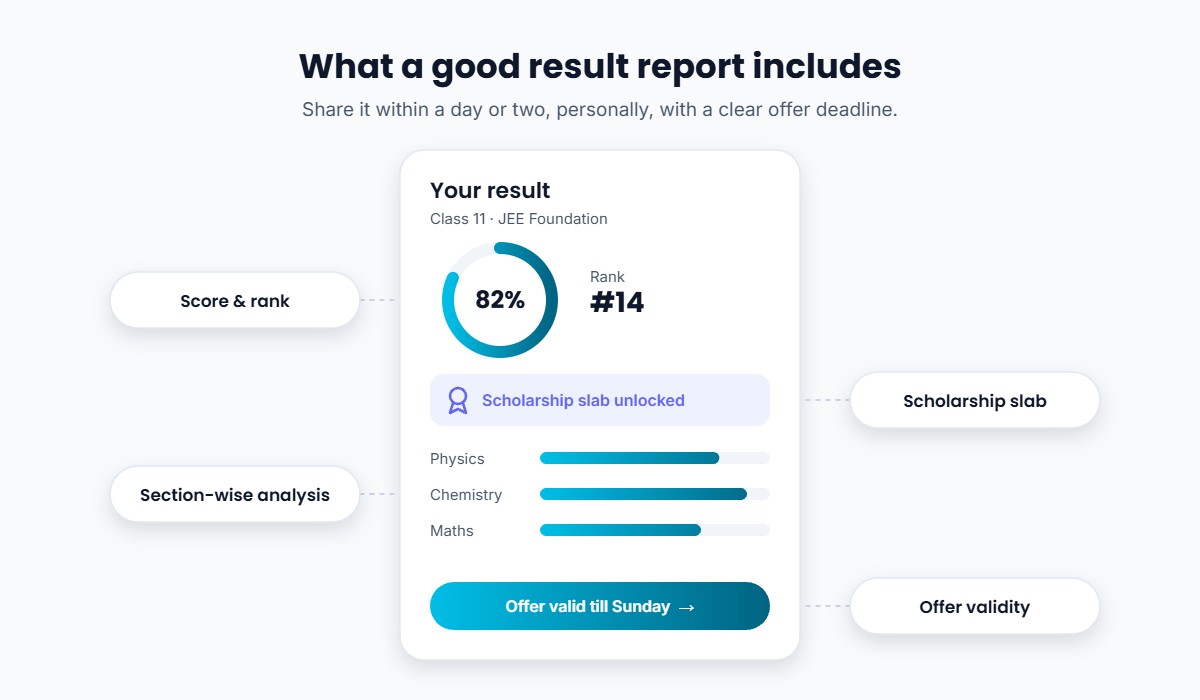
Interest drops fast. Aim to share results within a day or two:
- A personal result for each student: score, rank and scholarship slab.
- A short section-wise analysis showing strengths and weak areas.
- The offer validity date and how to claim it.
Auto-graded online tests make this much easier, because results are ready the moment the test closes.
Step 8: Follow Up to Convert Test-Takers into Admissions
This is where most of the admissions happen.
- Call every family, starting with the top scorers. Explain the result and the scholarship.
- Invite them to a free demo class or counselling session. These tips to convert demo classes into admissions help here.
- Make payment easy: share a payment link so parents can pay the discounted fee online, in full or in instalments if you offer them.
- Remind before the offer expires, without pressure tactics.
- Stay in touch with students who don’t join now. Share free practice material. Some will join a later batch.
Common Mistakes to Avoid
- Promising “up to 100% scholarship” without saying how many students get it. Parents notice, and it damages trust.
- Setting a paper that’s too hard. Students who score very low feel discouraged and rarely join.
- Slow results. A week’s delay can lose you students to a faster institute.
- No follow-up plan. Registrations without calls and counselling are wasted leads.
- Giving the biggest discounts without a budget. Decide your total concession budget before setting slabs.
- Hiding conditions. State clearly which fees are covered and for how long.
How Classplus Can Help
Running a scholarship test involves registrations, a fair online test, quick results and a lot of follow-up. With Classplus, you can do most of it inside your own branded app:
- Create and schedule online tests with your question bank, timers and auto-grading.
- Track student performance and see results as soon as the test ends.
- Send notifications for reminders, result announcements and offer deadlines.
- Collect fees online when students enrol in the course.
- Manage students and batches, then continue with live classes, recorded lectures, assignments and study material after they join.
The test experience a student has with you is the same app they will learn in after admission, all under your institute’s name.
Run your next scholarship test in your own branded app. Online tests, instant results, notifications and fee collection in one place. See how Classplus works →
Conclusion
A scholarship test works when it is planned like an admissions campaign, not announced like a discount. Set your goal and budget, build a fair paper, publish clear slabs, promote it well in advance, share results fast and follow up with every family.
After admissions, keep the momentum with regular tests. Here’s how a good test series improves student performance, and how you can later sell a test series online to students beyond your batch.
Frequently Asked Questions
What is a scholarship test in coaching?
It is an entrance-style test a coaching institute conducts before a new batch. Students who score well receive a fee concession, usually in slabs based on score or rank.
Should a scholarship test be free or paid?
Free tests usually get more registrations, while a small registration fee tends to attract more committed students. Choose based on whether you need reach or seriousness more.
What syllabus should a scholarship test cover?
What the student has already studied, usually the previous class, in the pattern of their target exam. Don’t test topics you will teach in the course.
Can I conduct a scholarship test online?
Yes. Use a platform that supports timed tests, randomised questions and auto-grading so results are fair and instant. Run a short practice test first so students are familiar with it.
How soon should scholarship test results be announced?
Ideally within one or two days, with a personal score, rank, scholarship slab and offer validity date.
How do I convert scholarship test students into admissions?
Call every family, invite them to a demo class or counselling session, make online payment easy, and remind them before the offer expires.