Looking for new methods to create engaging educational videos with eye-catching backgrounds? For online training, go no further than the green screen studio setup. A green screen is a popular technique used in video and photographic production that allows a solid-colored background to be removed from a scene and replaced with a different background required according to your educational needs.
You may add any image or video to your background with this simple green screen and make your lectures more engaging for your students. Whether you’re a seasoned video creator or just starting out, learning how to set up a green screen studio is a game-changer.
Let us understand in detail how you can set up a green screen for online teaching for your studio in detail.
What is a Green Screen?
A green screen is a popular technique used in video and photographic production that allows a solid-colored background to be removed from a scene and replaced with a different background required according to your educational needs and requirements.
Green screen for online teaching is extensively utilized for creating engaging educational videos. They enable the creation of a diverse range of special effects to make your videos more attractive and engaging for your students.
Benefits of Using Green Screen Setup
Using green screen setup technology for online teaching is a very effective tool for virtual classes as it helps to increase student engagement and improve the overall learning experience. The benefits of using green screens are many, such as:
- With the use of green screen for online teaching, you can reduce the usage of props
- It helps to keep students engaged throughout the session
- Using green screen enhances creativity
- Teachers can layer any background as per the subject requirement and make it look more creative
- With the help of green screen teachers can shoot wherever they want whenever they want
- Easily incorporate visual aids, images, and videos into your lessons
Green screen studio for online teaching is extensively utilized for creating engaging educational videos. They enable the creation of a diverse range of special effects to make your videos more attractive.
How to Set Up a Green Screen Studio – Things to Consider
Using a green screen studio setup technology can aid in the creation of a distinct brand identity for your educational videos or YouTube videos, making them more memorable, engaging and recognizable to viewers. Here are the steps to follow to have a green screen setup.
1. Buy a Green Screen
Begin with selecting the best green screen as per your choice and requirements. Before you start adjusting your green screen studio for online teaching, it is important for you to select the most suitable green screen for you. Consider your budget, requirements etc., while buying the screen.
Click here to choose the best green screen as per your requirements.
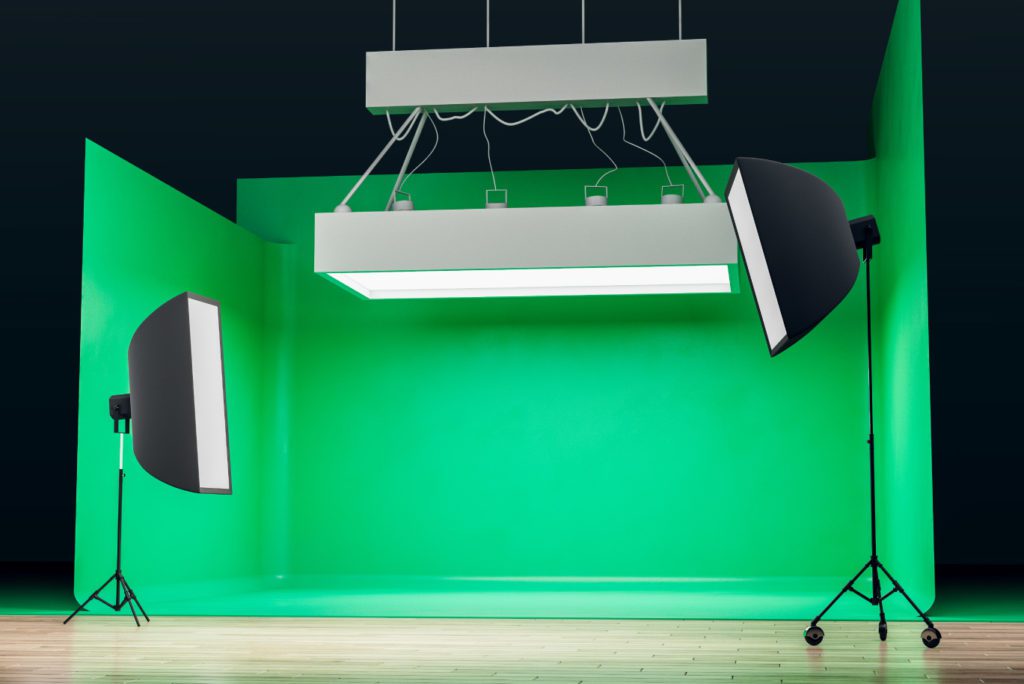
2. Adjust Proper Lighting
When setting up a green screen studio, it is important to adjust the lighting because it greatly impacts the final video quality.
Shadows, uneven lighting, and reflections can cause issues throughout the editing process, making removing the green screen background difficult. So it becomes an important step while setting up your green screen.
Another way to provide good lighting is by using the three-point lighting system; leading light, fill light, and a backlight to illuminate the screen.
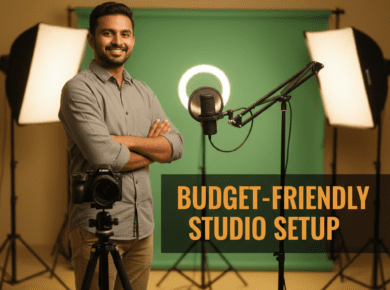
3. Proper Camera Positioning
Setting up your camera for the green screen studio is necessary to get better quality videos or photos. Camera settings, like brightness, focal length, alignment, etc., must be fixed beforehand.
These settings effectively impact the quality of the final footage you will obtain. You can create a professional-looking outcome by taking the time to optimize your camera settings and location.
Also Read: The Best Camera for Online Teaching
When setting up a green screen studio for online teaching, proper camera positioning is important to avoid distortion and maintain a natural perspective.
4. Record Your Videos
After placing the camera and adjusting the lights, it’s time to start recording your video. Write a script before recording your video to ensure you don’t miss any important points. Next, sit before the green screen setup and start recording the videos.
Points to remember while recording your video
- Don’t speak too fast or too slow
- Maintain a pace instead of hurrying up.
- Remember to review the entire script before starting the recording process so you don’t get stuck in between.
- Be confident while speaking in front of the camera, as it will keep your students engaged throughout the session without getting distracted.
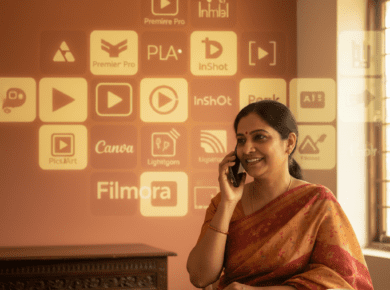
5. Choose a Software for Editing
Choosing a good software for editing videos for online teaching is essential for creating engaging and successful content. It helps improve the quality of your videos, provide you with more editing options, increases productivity, and assures interoperability with other applications and platforms.
Ensure that the software selected by you has features like color grading, noise reduction, and audio upgrades and is capable of providing good visual and audio quality.
It also allows you to edit and customize your content by adding graphics, text, and other visual components and trimming and cutting your footage to the desired length.
Conclusion
Using a green screen studio can considerably improve the visual experience, producing immersive and engaging content for your online classes. It is necessary to have the proper equipment, such as green screen cloth, illumination, and a camera, to set up the best green screen studio setup for online teaching.
Now that you’re set with your green screen studio setup, let Classplus guide you in expanding your online teaching. Connect with us to boost your income, manage live classes, and more. Ready to elevate your coaching? Take a FREE demo for your own teaching app today!
How to have a green screen studio setup FAQs
A1. A green screen studio setup is a background used in video production that allows you to remove the background and replace it with another image or video of your choice.
A2. The size may vary on the basis of your requirements and space available for the setup. But a size of about 12’x12′ is recommended for a small studio setup.
A3. Editing videos with green screens can be challenging, but with the right software and skills, it is definitely achievable.
A4. Green screens work by using chroma keying to digitally remove the green background and replace it with any desired image or video.
A5. The color of a green screen is typically a bright, fluorescent green.