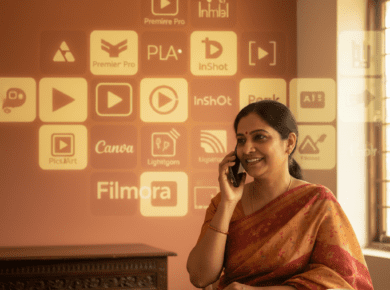
As online and hybrid learning models become more common, teachers are exploring tools that enhance the digital classroom experience. One such tool gaining immense popularity among educators is OBS Studio. Whether you are teaching live or recording lessons for future reference, OBS (Open Broadcaster Software) can revolutionize your digital teaching methods.
In this comprehensive blog, we’ll break down what OBS is, how it can be used in teaching, why it’s beneficial, and how to get started—even if you’re not tech-savvy.

What is OBS in teaching?
OBS (Open Broadcaster Software) is a free, open-source platform used for video recording and live streaming. Originally popular among gamers and streamers, it’s now widely used by teachers, educators, and content creators to produce professional-quality video content.
In teaching, OBS allows educators to:
- Record video lectures with dynamic layouts
- Share multiple screens (slides + webcam + visualizer)
- Stream live classes to YouTube, Facebook, or Zoom
- Create a branded, interactive digital teaching environment
It combines all the tools you need into one: webcam input, screen sharing, media overlays, transitions, and more—all in one place.
Why Should You Use OBS as a Teacher?
Here’s why OBS stands out for educators:
- Professional Look: OBS allows layering (webcam + slides + annotations), making your classes look more polished.
- Cost-Effective: 100% free, with no watermarks or usage limits.
- Customizable: Tailor your scenes to match your subject or audience.
- Flexible Output: Record your lecture or stream it live, with full control.
- Multi-platform Support: Stream on YouTube, Facebook, Twitch, or your LMS.
- No Hardware Limitation: Works well even on mid-range laptops.
How to Use OBS: A Step-by-Step Guide for Teachers
Here’s a beginner-friendly guide to using OBS:
Step 1: Install OBS
- Visit https://obsproject.com/ and download the version for your OS.
- Install and launch the application.
Step 2: Create a Scene
- A scene is your virtual classroom. Name your first scene as “Lecture Setup.”
Step 3: Add Sources
Sources are the content inside your scene.
- Display Capture: Share your screen (PPT, browser, etc.)
- Window Capture: Share a specific app (PowerPoint, PDF reader)
- Video Capture Device: Add your webcam
- Audio Input: Add your mic
- Image/Text: Add your name, subject, or school logo
Step 4: Set Up Audio and Video
- Use your preferred mic and webcam.
- Test and balance audio levels.
Step 5: Record or Go Live
- Hit “Start Recording” to record your lesson.
- Or click “Start Streaming” to go live (you’ll need to connect your YouTube/Zoom/Facebook account).
Step 6: Save or Upload
- OBS saves your recordings automatically to a selected folder.
- Upload it on YouTube, Google Drive, or your school portal.
What Is Better for Teachers: OBS vs Other Tools?
Let’s compare OBS with other popular teaching tools:
| Tool | Free? | Recording | Streaming | Customization | Ease of Use |
| OBS | ✅ | ✅ | ✅ | 🔥 High | Medium |
| Zoom | ❌ (Limited Free) | ✅ | ✅ | ❌ Low | Easy |
| Google Meet | ✅ | ✅ (limited) | ✅ | ❌ Very Low | Easy |
| Loom | ❌ (Limited Free) | ✅ | ❌ | Medium | Easy |
| Camtasia | ❌ (Paid) | ✅ | ❌ | High | Medium |
Verdict: For those looking to combine recording + streaming + customization, OBS is the most powerful free tool available.
Benefits of Using OBS for Teaching
1. Engaging Lessons
Dynamic layouts, animations, and overlays make lessons more exciting.
2. Better Student Attention
Visual transitions and camera switches keep students focused.
3. Reusable Content
Record once, use forever. Ideal for flipped classrooms.
4. Subject Flexibility
From Math to Music, OBS can handle screen shares, documents, drawing tablets, and audio-visuals.
5. Increased Reach
Livestream your class to reach students beyond your local school.
6. Interactive Learning
OBS supports plugins for chat integration, alerts, and polls when streaming.

OBS Layouts That Work for Teachers
- Split Screen: One side slides, other side webcam
- Picture-in-Picture: Webcam overlay in corner
- Whiteboard Mode: Share a visualizer or digital drawing pad
- Live Coding/Demonstration: Great for CS, Science labs
How to Use OBS with Other Tools
- OBS + PowerPoint: Switch slides while maintaining webcam overlay
- OBS + Zoom: Use OBS as a virtual camera in Zoom for better quality
- OBS + YouTube Live: Schedule public or private classes easily
Common OBS Mistakes Teachers Make
- Audio Not Working: Always test your mic before recording.
- Laggy Video: Lower video resolution to avoid stutters.
- Too Many Sources: Keep it simple at first, then scale.
Real-Life Use Case: How Teachers Are Using OBS in Classrooms
Case Study: Ms. Anjali Sharma, a Biology Teacher in Pune
During the pandemic, Ms. Sharma started recording video lessons using her phone. Soon, she discovered OBS and upgraded her teaching setup.
“OBS changed the way I teach. Now I can show diagrams, draw on them in real-time, and explain using animations. Students love it!”
She now runs a YouTube channel and uses OBS to record all her lessons, earning ad revenue on the side.

OBS for Pre-recorded vs Live Classes
| Use Case | OBS Benefit |
| Pre-recorded Lessons | Record high-quality tutorials |
| Live Classes | Stream seamlessly with transitions |
| YouTube Channels | Build an educator brand |
| Webinars | Look professional with overlays |
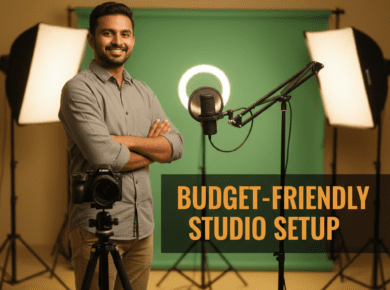
What Equipment Do Teachers Need for OBS?
- Laptop/Desktop (i5 or Ryzen 5 and above preferred)
- Webcam (External gives better quality)
- Microphone (USB mic or lapel mic recommended)
- Digital Pen/Tablet (For diagrams or math equations)
- Headphones (To avoid echo while streaming)
OBS Tips for Better Teaching Content
- Use hotkeys to switch scenes quickly
- Add background music for intro/outro
- Brand your videos with logo and name
- Save templates to use across classes
- Keep a water bottle handy – streaming is intense!
Future of OBS in Education
With the rise of hybrid education, flipped classrooms, and YouTube teachers, OBS is becoming an essential tool for the modern educator. As AI tools, animations, and visual aids become more integrated, OBS will continue to be the core of digital teaching infrastructure.

Conclusion: Should You Start Using OBS Today?
Absolutely! If you’re a teacher looking to level up your digital teaching game, connect with more students, or simply create better-quality lessons, OBS is your best bet. It’s free, powerful, and scalable. Whether you’re recording a tutorial, conducting a live class, or building an educational YouTube channel, OBS gives you the tools to do it right.
Don’t let the tech intimidate you—start small and keep building.
FAQs on OBS for Teachers
1. Is OBS free for teachers?
Yes, OBS is completely free and open-source. There are no hidden charges or watermarks.
2. Do I need a high-end computer to run OBS?
While OBS works better on systems with decent RAM and CPU, it can run on most laptops. You can always adjust the settings for low-spec systems.
3. Can I use OBS to teach live on Zoom?
Yes! OBS has a “Virtual Camera” option that lets you use OBS output as your webcam in Zoom, Teams, or Google Meet.
4. Is OBS difficult to learn for non-tech-savvy teachers?
Not at all. The learning curve is moderate. Once you understand scenes and sources, it’s easy to manage.
5. How can OBS help in hybrid teaching?
You can use OBS to record the in-class lesson while simultaneously streaming it to students attending remotely.