There’s nothing more interesting, entertaining, and engaging than watching someone else teach something. The best teacher-led videos for your online courses are some of the most successful in terms of reach and impact. Many great video makers online can help you create educational and teaching videos for your students taking your online courses. YouTube is a great resource. You can find the best educational and teaching YouTube channels for a teacher’s day video, student video, or teacher and student video. All are great ways to learn more about making teaching videos for your classroom.
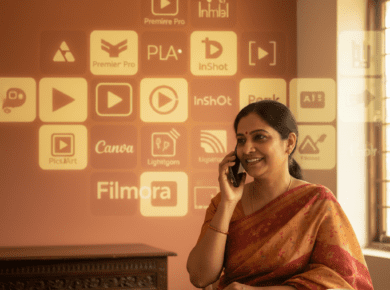
There are various teaching tools available, including an online video maker. A socrative teacher is an excellent option for those looking for an online video editor. It offers a variety of features, including the ability to add captions, watermarks, and effects. Video Compressor Online is another great option for those looking to compress their videos. Finally, free Intro Maker is an excellent option for a free online video editor.
With viewers from all over the world, millions of views on YouTube, and healthy tuition industries need to expand their teaching skills and resources. Many consider teaching videos to be “the future” of education.
Here are some tips for making your video lessons
Pick a Subject
What do you want to teach that can be taught in twenty minutes or less? You will not cover the entire subject, so select the core lesson and be sure that it can be prepared in under twenty minutes (or for more in-depth lessons, one hour). Then, stay focused on each lesson.
There are times when a lesson is impossible to complete and cannot teach a lesson within one video. In those cases, you may have to create several videos from this single point of instruction. While your main focus is to establish a teacher image for your students, you will have many opportunities to grow this persona in future videos.
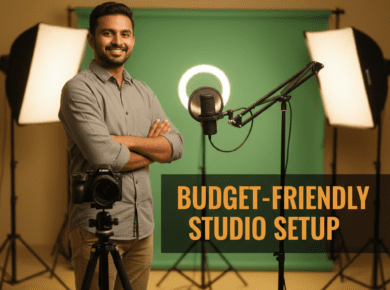
Set Up a Production Team
You will need a cameraperson (even if you are) and a sound person. You may also want to use some music or have pre-recorded sound effects as part of your lesson. If you are recording your lessons, then consider using green screen technology. It will allow you to switch backgrounds at a later time.
Prepare Your Instructions
You want to be sure you have a clear picture of how you want to conduct the class and what will happen in each video segment. So, first, create an outline of your lesson and fill in the details. Also, think up several questions that you can ask at the end of your video.
These questions will help you build a relationship with students and provide you with some extra content for future videos. It also serves as a good place to get feedback from future viewers on how they like your class or not. You can adjust future lessons accordingly to achieve success levels with students.
Record Your Video
You will want to set up your classroom. You will want to prepare the props or have an assistant ready to hand you the props at the right time. You should have everything ready to go before your student shows up so that you can spend 100% of your time addressing the class and providing them with instruction. If you are using a green screen, remember to be in front of it during your recording. It will allow you to superimpose a background later on when editing your film.

Edit Your Video
You want to get an instructor image on camera. So make sure your clothing is clean and appropriate for the subject matter. While you want to be yourself, you need to also be professional, so wear something that projects a level of professionalism (and cleanliness).
While you can use green screen technology in most cases, there may be times when it is not appropriate. You may have to do several takes before you get the right one. Edit out any errant mistakes, or stop points in the video. You will also want to add music and title the video for easy searches later on by students looking for specific lessons in your class series.
Edit Your Photos
You might consider taking photos throughout your video lesson. You will have to upload them to an online photo-sharing site, such as Flickr or Photobucket, and then use the “embed” function in your video or website. The embed function provides a place for photos to go when they are embedded on a web page.
Share Your Video
Uploading a video is simple with most services, but if you want it to go viral, then upload it to YouTube. The videos are easily searchable by any search engine and provide instant gratification for viewers who want to see more of what you have to offer.
Promote your video
After you have uploaded your video to YouTube, share it with friends, family, or teachers to get feedback and comments before posting it to the public. You can also use tools like PowToon and VideoHive for easy sharing of videos at any time.
Know When to Stop Recording
Although you will want to keep recording until the class gets over, in some cases, your students may leave during class. If this happens, either wait until they come back later in the day (if possible) or end the class early so that you do not miss any part of the content that you might need later.
Teachers might face challenges in doing all that work. Classplus can help teachers to deal with these challenges by giving them their own app to work on and handle everything in one place.